MENU

Carruse

jueves, 27 de agosto de 2020

apenas que había acabado

cómo usar el método de Forecasting para poder prevenir medidas cuando ya sabes que estás tomando una mala decisión

Sobre el poder de las expresiones y palabras bien escogidas para hacer sentir bien a los demás

Eres un lindo 
Eres una linda 

contents of a concern list

abajo o debajo diferencia de uso

Sobre la habilidad de predicción en la comunicación humana

La otra vez lleguéa la tiendita y dije: me das uno como el de Él (refiriéndome a Christian Serna) un Sprite sin azúcar. Las muchachas de la café me dijeron que solo me entendieron lo segundo , lo del Sprite sin azúcar , eso me demuestra lo que yo ya sudorosa desde hace tiempo. Sobre la capacidad de predicción en la traducción, yc en casi todo, es por eso que es tan importante el Forecasting.

cómo desarrollar el sentido de urgencia.

best font for ppt


The design choices we make in our presentations – the colours, the icons, the photography and illustrations – all form a kind of shorthand through which our audiences recognise our brand and get a feel for the message we’re aiming to communicate. The same goes for the fonts we use. Fonts have as big an impact on design style as the visuals. Beautiful photography and well-designed icons can all be undermined by a poorly-chosen typeface. You need to use a font that aligns with the rest of your design style, and with the personality you’re trying to convey. You need a font with the right ‘voice.’

But how do we pick one? Before we get into our recommendations for 10 of the best presentation fonts, let’s run through some of the questions you can ask to help you decide.

Is it a Windows-standard font?
Before we get started this is probably the most important question to ask is if your font should be Windows-standard.

Free download: If you’re not sure what is Windows-standard and what isn’t, then download this list of Windows-standard fonts for your reference.
We’ll have a look at custom fonts later in this article, but one last question to ask is if the font you intend to use is Windows-standard. Why does this matter? Well, if you make a beautiful presentation using a custom font and then send it to your colleague who doesn’t have the font installed, their version of the presentation will be a huge mess of mis-sized default fonts that isn’t really fit for purpose.

So, if you’re going to be using your presentation on multiple machines, you need something that will work on all of them – you need a Windows-standard font.

And, in case you were wondering, the ten we recommend here are all on that list.

Are you choosing a font for headings or body text?
The first thing to consider is where your text will be used – does it need to be easily readable in longer paragraphs and smaller sizes? Or can you afford to go bigger? Are you looking for a larger, more impactful slide title?

Whether your font is for heading or body text will help inform your answer to the next question…

Serif or sans serif?
Serif fonts have little ticks or ‘wings’ at the end of their lines, and are usually associated with serious, business-like, intellectual content, whereas sans serif fonts – like this one – have no marks on the ends of their lines, and are usually seen as modern, sleek and clean.

General wisdom is that serif fonts are better for print and for body text, as the serifs lead the eye from one character to the next like joined handwriting. Alternatively, sans serif fonts are better for titles and text displayed on a screen. But these are not hard and fast rules! A popular idea is to choose one of each, perhaps titles will be sans serif and body text will be serif, but it’s up to you – choose what feels right for your brand. Do you want to appeal to tradition, to intellectual weight with a serif font, or do you want your text to feel modern, to speak of technology and progress with a sans serif choice? Which leads to the final consideration…

How much familiarity do you want?
Many of the most popular typefaces already have well established voices. Everyone knows Times New Roman is serious, respectable, reliable. Everyone knows Arial is clear, no-nonsense, professional. If you want your audience to feel the familiarity of these tried and tested fonts, easily done! Or do you want to escape the familiar, be a little bit unique and memorable with a font your audience hasn’t already seen that day?

Once you have the answers to these questions, and have decided on the ‘voice’ you want to convey, you are finally ready to start searching for your font! Read on for our recommendations of 10 of the best fonts you can use for your next presentation.

10 best presentation fonts
1. Garamond
presentation fonts

‘Garamond’ actually refers to a style of font, rather than one font in particular. Some examples you may have heard of include Adobe Garamond, Monotype Garamond and Garamond ITC. All of these fonts are slightly different, but all have their origins in the work of Claude Garamond, who designed the original punch cuts in the 1500s, making Garamond fonts some of the oldest around.

Prior to Claude Garamond’s work, fonts were designed to mimic the handwriting of scribes. Garamond’s typefaces however (there are 34 attributed to him), were designed in the Roman style, with the letters’ ascenders vertical and the crossbar of the letter ‘e’ horizontal, instead of slanted as in earlier calligraphic fonts. The letters were designed this way to increase legibility in print, which is what makes Garamond fonts such a great choice for body text. Such a great choice in fact, that the entire Harry Potter series is printed in Adobe Garamond. Outside of print, Garamond fonts have been used in the logos of numerous brands, including Rolex and Abercrombie and Fitch, and giants Google and Apple.

With their rich history and elegant readability, you can be confident that a Garamond font will bring a timeless sophistication to your slides, while keeping your text legible.

2. Palatino
presentation fonts

Palatino was designed by Hermann Zapf in 1949. Based on the type styles of the Italian Renaissance, Palatino draws influence from calligraphy, and is in fact named after master calligrapher Giambattista Palatino – a contemporary of Claude Garamond. Zapf intended Palatino for use in headings, advertisements and printing. More specifically, it was designed to remain legible when printed on low quality paper, printed at small size or viewed at a distance.

Palatino Linotype is the version of the font included with Microsoft products, and has been altered slightly from the original for optimum display on screens. Book Antiqua, also a Microsoft default font, is very similar, almost impossible to tell from Palatino Linotype.

presentation fonts

Both of these fonts are good choices for body text – a little unusual, they will set your slides apart in a sea of Arial and Times New Roman, while with their airy counters and smooth, calligraphic lines, maintaining elegance and readability.

3. Verdana
presentation fonts

Verdana was designed by Matthew Carter for Microsoft in 1996, deliberately crafted for use on computer screens. The letters are widely spaced, with wide counters and tall lowercase letters, making this font extremely readable, especially when displayed at small sizes. Verdana is also nearly ubiquitous, it has been included with all versions of Windows and Office since its creation. One survey estimates it is available on 99.7% of Windows computers, and 98.05% of Macs. On the one hand, this makes it a very safe bet – you are almost guaranteed your presentation will appear as you intended on all devices, but on the other hand, you may not stand out from the crowd as much as you may like!

You can’t argue with its legibility though. Verdana is an excellent font to use for small text, for example, to keep your footnotes, references and disclaimers readable. Or, for a safer choice, Verdana’s unobtrusive, effortlessly legible characters will keep your audience’s attention on what you have said, not the font you’ve used to say it.

4. Segoe
presentation fonts

If you’ve used a Windows computer, used Skype, played on an Xbox 360 or just seen the Microsoft logo, you have seen a font from the Segoe family. Microsoft uses Segoe fonts for its logos and marketing materials, and Segoe UI has been the default operating system font since Windows Vista. This is all down to its beautiful simplicity, and on-screen legibility. Similarly to Verdana, Segoe fonts look perfect on screens and at small sizes, and are warm and inviting while maintaining the airy, aspirational feel of technology and progress. Unlike Verdana though – which has wide spaces and heavier letters – Segoe fonts are also a great choice for titles and headers.

Another fun bonus from the Segoe font family is the expansive set of symbols and icons it offers. From the insert tab in PowerPoint, click symbol, and change the symbol font to either Segoe UI Symbol, or Segoe UI Emoji, and marvel at the reams and reams of symbols to choose from. There are shapes, arrows, musical notes, mathematical notation, scientific notation, there are animals, buildings, food, Mahjong tiles, Fraktur letters, I Ching hexagrams… Likely any symbol you could possibly want is in there!

So for easy to read body text, light, elegant headers, or a quick and easy way to bring just about any icon you can think of into your presentation, the Segoe font family is a perfect choice.

5. Franklin Gothic
presentation fonts

What is it that makes a font ‘gothic?’ There’s certainly nothing about Franklin Gothic that speaks of bats in belfries or doomed lovers wandering the Yorkshire moors! Well, confusingly, when describing fonts ‘Gothic’ can mean completely opposite things – it is sometimes used to refer to a Medieval-style, blackletter font, or conversely, it can be used as a synonym for the clean, geometric, sans serif fonts that began their rise to prominence in the early 19th century. And that’s certainly the category Franklin Gothic fits into.

Designed by Morris Fuller for the American Type Founders in 1902 and named after the American printer and Founding Father Benjamin Franklin, Franklin Gothic is a classic American font that has been described as ‘square-jawed and strong-armed, yet soft-spoken.’ With its wide range of weights and widths, and interesting design details (take a look at the uppercase Q and lowercase g for some beautiful, unusual curves, and the uppercase A and M for subtly varying line weights), Franklin Gothic will look strong and approachable as your headings, and classy and legible as your body text.

6. Candara
presentation fonts

Candara was designed by Gary Munch, and released with Windows Vista in 2008. It is part of a family of six Microsoft fonts, all beginning with the letter C (Calibri, Cambria, Consolas, Corbel and Constantia), that were all optimised for use with Microsoft’s ClearType rendering system.

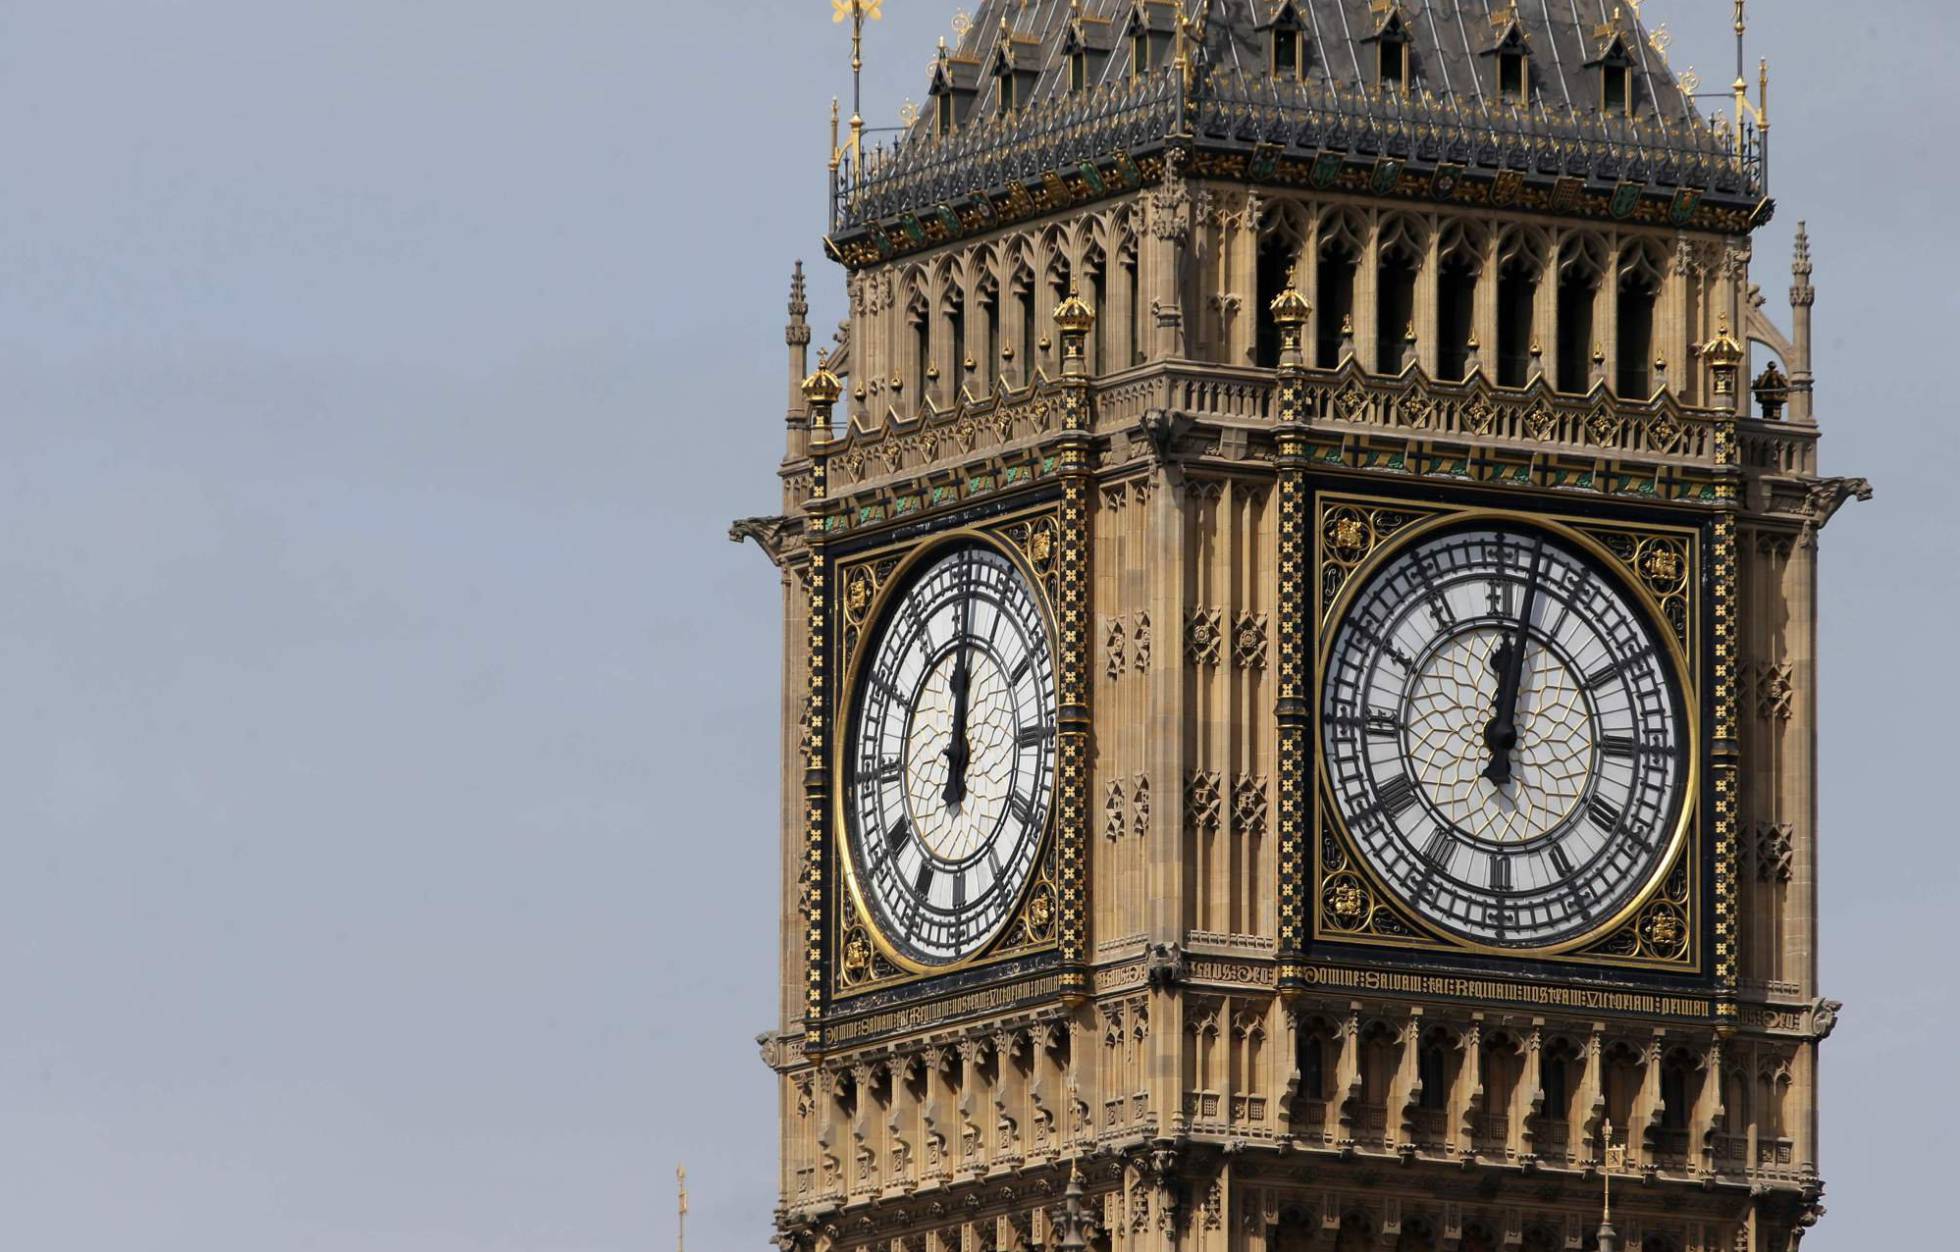
The most interesting thing about Candara, and what makes it such a beautiful font to use, is the influence of architecture on its design. If you look closely at the letters’ ascenders, you will notice an entasis at their ends, which means there is a slight convex curve towards the ends of the lines – a feature best known from classical architecture. Columns built by ancient Greek, Roman, Incan, Aztec and Chinese empires were built with this convex curve, a particularly famous example being the columns of the Parthenon in Athens. Historians believe columns were built in this way to give an impression of greater strength, to correct for the visual illusion that very tall, straight columns appear to bow inwards as they rise.

And the architectural influence doesn’t end there, Candara’s diagonal lines – best seen in the capital X, N and A – have been designed with unusual ogee curves. Most often seen in Gothic arches from 13th and 14th century Britain, an ogee curve is part convex, part concave, forming a shallow S shape as it rises. Two ogee curves meeting in the middle form an arch that rises to a point – like Candara’s capital A.

presentation fonts

These entases and ogee curves are what makes this font pleasingly unusual. At first glance, it is a standard, easy-to-read sans serif that looks crisp and clear on screen, but on closer inspection, Candara has some interesting design details that set it apart. Candara is perhaps not the most serious looking font, but if you’d like something slightly unusual, but still professional and perfectly legible, consider Candara.

7. Bodoni
presentation fonts

Similarly to Garamond, Bodoni refers not to a single font, but to a family of typefaces inspired by the centuries old work of a master typographer. Giambattista Bodoni was an extremely successful master printer who lived and worked in the Italian city of Parma through the late 18th and early 19th century. Along with a French typographer named Firmin Didot, Bodoni was responsible for developing the ‘New Face’ style of lettering, characterised by extreme contrast between thick and razor thin lines.

You will have seen this in action if you have ever glanced at a fashion magazine. Vogue, Harper’s Bazaar and Elle all print their names in a Bodoni font. In fact, these fonts are so prevalent in fashion graphic design that they have become a shorthand for the elegance and refinement the fashion world idealises.

The sharp lines and smooth curves of these fonts have been compared to the precise geometries of fabric patterns, and their delicate, graceful forms afford them a sophisticated femininity. This delicacy also make these fonts perfect for overlaying photographs. You will notice from the fashion magazine covers how the titles maintain their presence, but don’t overpower the photograph beneath. You can use this to great effect in your own designs; if you need to layer text over photographs, Bodoni fonts could be a stylish and sophisticated answer.

Best used in headings displayed at large sizes where contrasting line weights will have maximum impact, Bodoni fonts will instantly instil your design with an effortless, timeless elegance. Bodoni himself wrote that the beauty of type lies in “conformity without ambiguity, variety without dissonance, and equality and symmetry without confusion.” Bodoni fonts have all those things in abundance, and are some of the most beautiful fonts you can choose to use.

8. Bell MT
presentation fonts

If Bodoni fonts are just that bit too extreme, try Bell MT instead. They have similar roots – both Bodoni and Bell fonts were influenced by the work of French typographer Fermin Didot, and have the same ‘New Face’ style contrast between thick and thin lines, just to a lesser extent with Bell fonts.

Designed in 1788 by the punch cutter Richard Austin, commissioned by the publisher John Bell, Bell fonts share similarities with Didot style fonts, but also with softer, rounder Roman fonts of the time such as Baskerville. The influence of flowing, cursive style fonts such as Baskerville can be seen in letters such as the uppercase Q and K, and the italic Y and z, which all have some beautiful, unusual curves. In fact, Bell MT is particularly attractive in italic, almost script-like while maintaining legibility. This makes it an excellent choice for sub-headings, as a softer counterpart to a sans serif heading. Or use it for quotes and testimonials, set in a beautiful Bell italic they will be inviting and authentic, as well as clear and readable.

9. Tahoma
presentation fonts

Coming from an indigenous Salishan language, Tahoma is one of the original Native American names for Mount Rainier in the US state of Washington.

Tahoma the font however was designed by the British typographer Matthew Carter working for Microsoft, and was released with Windows 95. It is a very close cousin of Verdana, but though similar, Tahoma is a little narrower and more tightly spaced than Verdana, giving it a more slender, slightly more formal feel. It is another example of a font that was designed specifically for screen use, meaning it will look good at a wide range of sizes, and on a wide range of screens, perfect if you are making a presentation that will need to display properly on multiple devices.

In fact, perfect clarity is what sets Tahoma apart from some similar sans serif fonts. The image below shows the characters uppercase I (eye), lowercase l (ell) and number 1 (one) written in four popular sans serif fonts (from left to right) Century Gothic, Calibri, Gill Sans and Tahoma. Notice how in every font but Tahoma, at least two characters are indistinguishable. Gill Sans, for example, is a disaster here. It’s unlikely you’ll ever need to write these three characters in quick succession, but for scientific, technical or mathematical content, clear distinction between these characters can be very important – and Tahoma gives you that.

presentation fonts

So with its easy to read, screen friendly design and readily distinguishable characters, Tahoma is an ideal choice for the slightly more formal, but still approachable, scientific or technical presentation.

10. Corbel
best presentation fonts

Designed by Jeremy Tankard and released in 2005, like Candara Corbel was also designed to work well with Microsoft’s ClearType rendering system, meaning it is specifically designed to work well on screens. Tankard described his aim when designing Corbel as ‘to give an uncluttered and clean appearance on screen,’ and describes the font as ‘legible, clear, and functional at small sizes.’ All of these things are important boxes to tick when you’re looking for a presentation font!

Corbel is a little more serious than Candara, again in Tankard’s words: ‘functional but not bland,’ designed to be ‘less cuddly, more assertive.’ The dots above the i’s and j’s for example are square, not rounded. The tail of the uppercase Q is straight and horizontal, not a whimsical curve. This makes Corbel a good choice for more serious or technical content, it is legible and without excessive embellishment, yet not characterless or overused.

One of the most interesting design details with Corbel is the fact that with this font, numbers are lowercase. What does this mean? Take a look at the image below, where you can see a comparison of how the numbers 0-9 appear in Corbel with how they appear in another popular sans serif font, Segoe UI. Notice how the Corbel numbers don’t line up exactly? This is know as lowercase or old-style numerals.

best presentation fonts

The purpose of this is to improve how numbers look when they form part of body text – they are a more natural fit with lowercase lettering. Few fonts have this option (for a serif option offering lowercase numbers, consider Georgia, also a Windows standard font), meaning Corbel can make a for a very unique choice. It will be both legible and readable, and its unusual numbers will add a unique and pleasing design touch to your slides.

What about custom fonts?
Sometimes what we want is not the familiar, the comforting, the Arial and the Times New Roman, sometimes we just want something different. This is your opportunity to step into the almost infinite world of custom fonts. Here you can find fonts to fit almost any imaginable need. From timeless and elegant and crisp and futuristic, to ornate scripts and decorative novelties, there will be a custom font for you.

But a word of warning on non-system fonts – custom fonts can be a powerful, attractive component of your presentation design, but if used incorrectly, they can also be its undoing.

A custom font will only appear in your presentation if it is played on a device with that font installed. On any other device, PowerPoint will replace your beautiful, carefully planned custom font with one of the system defaults, and this can have disastrous consequences for your design.

If your presentation is going to be built and presented exclusively from the same device you shouldn’t have a problem, but if multiple devices or operating systems are involved, or if you intend to share your presentation for others to use, to ensure your fonts survive the jump it is safer to stay in the realms of the system default fonts. There you can be confident your carefully crafted designs will stay exactly as you envisaged them, and you can concentrate on delivering the very best presentation.

You can find a useful PDF here detailing which fonts are available on all platforms for maximum compatibility.


Whatever font you do choose for your next PowerPoint presentation, ask yourself two questions:

Does this font have the right ‘voice’ for your brand?
Is it easy to read?
If the answer to both of the above is yes, then you are on to a winner. You know best what fits with your brand, and if a font captures your unique voice, and makes your slides easy for your audience to read, you are one step closer to that perfect presentation.

Further reading
For more advice on choosing the best font for your next presentation, and then making the very best of it in your design, take a look at our other articles:

10 typography tips and tricks to get you started
Advanced typography in PowerPoint
 

Sources:
https://www.wired.co.uk/gallery/futura-font-on-the-moon-christopher-burke-book
https://fontmeme.com/famous-logos-created-with-futura-font/
https://cei.org/blog/adobe-garamond-harry-potter-books-not-character-font
https://www.myfonts.com/fonts/itc/franklin-gothic/
https://study.com/academy/lesson/entasis-definition-architecture-architects.html
https://study.com/academy/lesson/ogee-arches-definition-construction.html
http://www.eyemagazine.com/feature/article/through-thick-and-think-fashion-and-type
https://www.quora.com/Why-don%E2%80%99t-lowercase-and-uppercase-numbers-exist
https://typographica.org/on-typography/microsofts-cleartype-font-collection-a-fair-and-balanced-review/
https://docs.microsoft.com/en-us/typography/cleartype/clear-type-font-collection
In addition – Wikipedia pages for each font in the list were used
Leave a comment
Share this
Linked iconTwitter iconFacebook icon
Written by

Elly Hughes
Senior consultant
View Elly Hughes's profile
Related articles
24th Jul 2020
How to create a random order slide show in PowerPoint
PowerPoint design / PowerPoint productivity
There’s no native feature in PowerPoint that lets you run your slides in a random order. But, where there's a will, there's a way! And with a touch of VBA, we've got a way.


Te lo digo chana para que lo entiendas Juana.

how to take notes in the form of mind map

on the importance of having a family tree

do bus vibrations have effect on health

sábado, 22 de agosto de 2020

La hora tan estricta de los desayunos en las cadenas comerciales .

 La otra vez me sentí como el protagonista de aquella película en la que quiere desayunar y que a esa hora no siren desayunos. No había sido un buen día para él, entonces se enoja y saca un arma

Most common used Alt symbols

  alt 1      ☺         alt 2      ☻         alt 3      ♥          alt 7      •         alt 8      ◘         alt 9      ○       

  alt 10     ◙         alt 11     ♂         alt 12     ♀         alt 13     ♪         alt 14     ♫         alt 15     ☼       

  alt 16     ►         alt 17     ◄         alt 18     ↕           alt 22     ▬         alt 23     ↨         alt 24     ↑       

  alt 25     ↓         alt 26     →         alt 27     ←         alt 28     ∟         alt 29     ↔         alt 30     ▲       

  alt 31     ▼          alt 35     #         alt 36     $         alt 37     %         alt 38     &         alt 39     '       

  alt 40     (         alt 41     )         alt 42     *         alt 43     +         alt 44     ,         alt 45     -       

  alt 46     .         alt 47     /           alt 91     [         alt 91     [         alt 92     \           alt 93     ]       

  alt 94     ^         alt 95     _         alt 96     `         alt 123    {         alt 124    |         alt 125    }       

  alt 126    ~         alt 127    ⌂         alt 155    ¢         alt 156    £         alt 157    ¥         alt 166    ª       

  alt 167    º         alt 168    ¿         alt 169    ®         alt 170    ¬         alt 171    ½         alt 172    ¼       

  alt 173    ¡         alt 174    «         alt 175    »         alt 232    Φ         alt 241    ±         alt 247    ≈       

  alt 248    °         alt 249    ·         alt 251    √         alt 254    ■         alt 0188   ¼         alt 0189   ½       

  alt 0190   ¾         alt 0215   ×         

Explain why you are not inviting someone to a meeting

Sometimes some people are not necessary at certain meeting, however your need to explain then why it is. If most of the people in your area will be in the meeting and you are the only one who is not going to attend, then explain the person something, but give then me dinosaurs

sí todo es importante nada es importante

Things to do after a meeting

Steve Jobs insisted that every item on a meeting agenda have a designated person responsible for that task and any follow-up work that happened. He called that person the DRI—the Directly Responsible Individual. He knew the public accountability would ensure that a project or task would actually get done, and he wanted to set clear, organized instructions for his team to follow.

It sounds simple enough, and yet the majority of managers and leaders completely fail to do this. We’ve all left meetings feeling good about what we discussed only to later wonder why so little happened as a result. Where did the momentum go?

There are a number of reasons why the productive conversations in a meeting seemingly go nowhere. Attendees are often immediately running to another meeting where their attention shifts to a new set of issues. Or people leave the meeting without clarity about what was agreed upon.

To make sure productivity doesn’t slow after you walk out of the room, do two things after and in between meetings: Quickly send out clear and concise meeting notes and follow up on the commitments made.

Meeting notes

As the Chinese proverb goes, “The palest ink is better than the best memory.” If you don’t capture the conversation and put into a form that can be easily retrieved later, the thinking and the agreements can be lost.

Meeting notes aren’t a necessary burden. They’re a powerful way to influence others. They help inform people who weren’t there about what happened and remind those who were there about what agreements they made. You can use them to keep everyone on the same page and focused on what you all need to get done before you meet next.

If you are working to reduce the number of people who attend your meetings, the notes take on more importance because people love to be included and informed. Sharing a summary of the meeting is an important part of working on engagement.

Two Things to Do After Every Meeting

November 26, 2015
nov15-26-2696244

Steve Jobs insisted that every item on a meeting agenda have a designated person responsible for that task and any follow-up work that happened. He called that person the DRI—the Directly Responsible Individual. He knew the public accountability would ensure that a project or task would actually get done, and he wanted to set clear, organized instructions for his team to follow.

It sounds simple enough, and yet the majority of managers and leaders completely fail to do this. We’ve all left meetings feeling good about what we discussed only to later wonder why so little happened as a result. Where did the momentum go?

There are a number of reasons why the productive conversations in a meeting seemingly go nowhere. Attendees are often immediately running to another meeting where their attention shifts to a new set of issues. Or people leave the meeting without clarity about what was agreed upon.

To make sure productivity doesn’t slow after you walk out of the room, do two things after and in between meetings: Quickly send out clear and concise meeting notes and follow up on the commitments made.

Meeting notes

As the Chinese proverb goes, “The palest ink is better than the best memory.” If you don’t capture the conversation and put into a form that can be easily retrieved later, the thinking and the agreements can be lost.

Meeting notes aren’t a necessary burden. They’re a powerful way to influence others. They help inform people who weren’t there about what happened and remind those who were there about what agreements they made. You can use them to keep everyone on the same page and focused on what you all need to get done before you meet next.

If you are working to reduce the number of people who attend your meetings, the notes take on more importance because people love to be included and informed. Sharing a summary of the meeting is an important part of working on engagement.

RELATED TOOL

Here’s what works: Distribute concise, clear notes about the meeting. Historically, minutes were like court transcriptions, capturing everything that was said during the meeting. This is not what you want. A single page will suffice for most meetings. The intent is not to re-create the discussion but to capture the key points and the specific commitments for each topic, so that non-attendees have a sense of what happened and all have a record of who will take further action.

These notes should state each topic you discussed, the key takeaways, and a list of specific actions that will be taken, by which people, and by when.

Write and distribute the meeting summary within 24 hours, if not sooner. Your ability to remember and capture the essence of each conversation lessens with each passing hour. Sending the summary out within an hour or by the end of the day also demonstrates a sense of urgency.

Follow up on commitments

Persistence is a key influence skill. If you want anything to happen, you must follow up, follow up, and follow up.

A university president once asked me to come do a training for a group of faculty and alumni because he thought they lacked leadership skills. He had pulled the group together two years prior to discuss starting a new school of journalism. They had a productive meeting and everyone was excited about the project. He had told them he was willing and able to provide whatever support they needed as they got the initiative off the ground. But two years later, nothing had happened and the president was convinced it was because the people in that meeting didn’t have the right skills.

But, in reality, he didn’t have a new journalism school because he hadn’t followed up. If he’d checked in with the group two weeks after the meeting, then followed up every few weeks until the project was up and running, it likely would’ve been a different story. Perhaps he would’ve learned that people in the room did have some skill deficits but he could’ve helped take care of those while they pushed the project forward.

Often managers, like this president, think that people are self-starters—natural leaders who only need an idea and the autonomy to pursue it. Talented, committed people do not always do what they say they will do, and we shouldn’t be surprised when they don’t. People are pulled in all different directions and overwhelmed with too much work. If you want a project to be completed, you have to follow up closely and consistently. Otherwise, rich ideas easily fall by the wayside.

Some managers are concerned that close follow-up might be interpreted as micromanaging. They don’t want to be accused of not trusting people to perform. In reality, consistent follow-up is a necessary part of project leadership.

Here’s what works:

  • At the end of each topic in a meeting, pause to agree on next steps and establish specific commitments with clear deadlines.
  • Let people know they can negotiate at the time they make the commitments, especially with regard to due dates.
  • Don’t use the automatic “by the next meeting” as the due date. Be thoughtful about what timing make the most sense.
  • Make clear that you expect each commitment will be fulfilled as agreed upon, and if something comes up, you expect they’ll reach out to discuss the change.
  • Assign someone to check in at appropriate intervals to ensure the commitments will be kept as promised or re-evaluated if something unexpected comes up.

One of the biggest complaints I hear from leaders is that they spend too much time in meetings. Designing and leading better meetings will help make better use of everyone’s time. But documenting commitments and managing the progress after the meeting is over will also help make future meetings are more productive or even unnecessary.


domingo, 16 de agosto de 2020

Cómo conducir una junta

Designar al responsable de la minuta.
Mencionar a los participantes.
Mencionar los temas que se tratarán.
Evita preguntar preguntas cerradas.
Pregunta opiniones.
Suponer que nadie sabe nada, fase un contexto abres de entrar a una explicación nueva.

Preguntar si alguien más tiene algún otro tema.

Mencionar los temas que se trataron.


miércoles, 12 de agosto de 2020

Pina nidan kata

Pinan NiDan Kata

Pinan NiDan (Peaceful Mind Number Two) kata.

1. From masuba dachi (attention stance), rei (bow), then open to hachiji dachi (ready stance).

2. Drop your body,setting your left foot to your left, into a left mahamni neko ashi dachi (left side facing cat leg stance), 90 degrees to your left, while doing a full motion agi uke (rising block)dropping into a tetsui uke (hammer fist block)with your left hand.

3. Step forward into a right junzuki dachi throwing a right junzuki.

4. Pull the front hand back across the chest. Pull the front foot back behind you twice the length of your previous stance, as you set it over to your left twice the width of your previous stance. Turn the body, to the right 180 degrees, without further movement of the feet (except to allow them to pivot around), into a right junzuki dachi (right front stance) throwing a right gedan uke (right low block.)

5. Pull your right foot back to a shazentai dachi (natural stance)(keep the right foot as your front foot and keep the angle of the feet as they were, just pull the foot back, the front heel even with the back toes, and let the legs straighten (don’t lock the legs). As you pull the foot back execute a full motion agi uke (rising block) dropping into a tetsui uke (hammer fist block) with your right hand.

6. Step forward into a left junzuki dachi throwing a left junzuki.

7. Turn your body, to the left 90 degrees, as you set your left foot to the left into a left junzuki dachi (left front stance), and throw a left gedan uke (left low block).

8. Step forward into a right junzuki dachi (right front stance) throwing a right jodan uke (right high block).

9. Step forward into a left junzuki dachi (left front stance) throwing a left jodan uke (left high block).

10. Step forward into a right junzuki dachi (right front stance) throwing a right jodan uke (right high block).

11. Set your left (back) foot around behind you 45 degrees, and let your body follow (turning around to the left 225 degrees) into a left junzuki dachi (left front stance), ending with a left gedan uke (left low block).

12. Step forward into a right junzuki dachi (right front stance) throwing a right junzuki (right front punch).

13. Turn your body, to the right 90 degrees, as you set your right foot to the right into a right junzuki dachi (right front stance), and throw a right gedan uke (right low block).

14. Step forward into a left junzuki dachi (left front stance) throwing a left junzuki (left front punch).

15. Turn your body, to the left 45 degrees, as you set your left foot to the left into a left junzuki dachi (left front stance), and throw a left gedan uke (left low block).

16. Step forward into a right junzuki dachi (right front stance) throwing a right junzuki (right front punch).

17. Step forward into a left junzuki dachi (left front stance) throwing a left junzuki (left front punch).

18. Step forward into a right junzuki dachi (right front stance) throwing a right junzuki (right front punch).

19. Pull your left foot back into a left shomen neko ashi dachi (left front facing cat stance) as you pivot the body to the left 225 degrees. As you make the turn, open your hands (the left one is in a yohon nukite (spear hand) position and the right one is in a open hand position, do not turn the hands over) and allow the right arm to relax back slightly on your center line and pointed straight forward as the left hand moves forward to a position just above the right hand and parallel to it.

20. Step forward with the left foot and turn into a left shiko dachi (four point stance) as you extend the left yohon nukite (left spear hand) (palm down), to your left side at belt level and draw the right arm back (palm up), finishing across your body. The right upper arm is hanging down, pulling forward from the shoulder just enough to allow the lower arm to be parallel across the front of your body. The lower arm is angled up slightly, crossing over the solar plexus, with the wrist remaining straight and the finger tips extending past the edge of the body.

21. Turn your body forward (the direction your left hand was striking, which is 45 degrees to the left of your original front line when you bowed) and step forward with your right foot into a right shiko dachi (right four point stance) as you extend the right yohon nukite (right spear hand) (palm down), to your right side at belt level and draw the left arm back (palm up), finishing across your body. The left upper arm is hanging down, pulling forward from the shoulder just enough to allow the lower arm to be parallel across the front of your body. The lower arm is angled up slightly, crossing over the solar plexus, with the wrist remaining straight and the finger tips extending past the edge of the body.

22. Pull your right foot back into a right shomen neko ashi dachi (right front facing cat stance) as you pivot the body to the right 90 degrees (45 degrees to the right of your original front line when you bowed). As you make the turn, flip both hands over (the right one remains in a yohon nukite (spear hand) position and the left one remains in a open hand position) and allow the right arm to relax back slightly on your center line and pointed straight forward as the left hand moves forward to a position just below the right hand and parallel to it.

23. Step forward with the right foot and turn into a right shiko dachi (right four point stance) as you extend the right yohon nukite (spear hand) (palm down), to your right side at belt level and draw the left arm back (palm up), finishing across your body. The left upper arm is hanging down, pulling forward from the shoulder just enough to allow the lower arm to be parallel across the front of your body. The lower arm is angled up slightly, crossing over the solar plexus, with the wrist remaining straight and the finger tips extending past the edge of the body.

24. Turn your body forward (the direction your right hand was striking, which is 45 degrees to the right of your original front line when you bowed) and step forward with your left foot into a left shiko dachi (left four point stance) as you extend the left spear hand (palm down), to your left side at belt level and draw the right arm back (palm up), finishing across your body. The right upper arm is hanging down, pulling forward from the shoulder just enough to allow the lower arm to be parallel across the front of your body. The lower arm is angled up slightly, crossing over the solar plexus, with the wrist remaining straight and the finger tips extending past the edge of the body.

27. Pull the right foot back and let the arms relax to your sides, ending in hachiji dachi (ready stance).

28. Close to masuba dachi (attention stance), then rei (bow).

Helpful Hints & Reminders

1. In every move of this kata, the hand that is either punching or blocking, is the front hand (the hand that is on the same side as the foot that is forward).

2. All turns are made by moving the front foot, except the “big turns” (after your third high block and, after your third punch in succession). And ALL turns are made by moving the foot toward the back of the non-moving foot (NEVER ACROSS THE TOES).

domingo, 9 de agosto de 2020

necessary number of songs to learn a language

sobre la importancia de cuidar las formas.

Alguien muy sabio una vez me dijo que no somos robots, que somos seres humanos. Por muy obvio o simple que parezca no es obvio ni es simple. Sí fuéramos simples robots, recibiríamos órdenes y las ejecutariamos sin más, pero no somos robot, somos humanos y dependiendo de la forma en que nos pidan las cosas serán los resultados.


martes, 4 de agosto de 2020

most desirable character traits

how to beat genes

chewing 32 tones is the magic number

Chewing food 32 times
Experts have a lot to say about chewing. One common piece of advice is to chew your food an estimated 32 times before swallowing. It takes fewer chews to break down soft and water-filled food. The goal of chewing is to break down your food so it loses texture.

Chewing 32 times appears to be an average number applied to most bites of food. Foods that are harder to chew, such as steak and nuts, may require up to 40 chews per mouthful. Foods like watermelon may require fewer chews to break down — as few as 10 to 15.

Benefits of chewing food
Chewing is the first step of digestion.

Chewing and saliva break down and mix food together in your mouth. From there, food goes into your esophagus when you swallow.
Your esophagus pushes food into your stomach.
Your stomach holds food while it mixes with enzymes that continue breaking down the food so you can use it for energy.
When food is digested enough in your stomach, it moves into your small intestine where it mixes with more enzymes that continue to break it down. Nutrients from the food are absorbed in the small intestine.
Wastes are sent to the large intestine, known as your colon. The leftover waste is excreted through the rectum and anus.
People can forget to chew their food or get into the habit of swallowing before they’ve fully chewed it. People who take bites that’re too big or too small might not be chewing food properly.

Chewing is not only an important part of the digestive process but it’s also beneficial to overall health. People who don’t chew their food well enough before they swallow often develop digestive problems, and are also at a greater risk for:

choking
aspiration
malnutrition
dehydration
Benefits of chewing food slowly
Experts say that the faster you eat, the more food you will tend to eat. Chewing your food many times at a slower pace can reduce your overall food intake.

In one study, 30 healthy women consumed meals at different paces. The women who ate slower consumed significantly less food yet felt fuller than those who ate quicker.

In another study, chewing more during mealtime was found to reduce snacking on candies later in the day.

Besides weight control, experts say that chewing your food properly can also help increase the amount of nutrients you get out of your food. In one study, experts found that chewing almonds between 25 and 40 times not only suppressed hunger but also increased people’s ability to absorb nutrients from the almonds.


How to chew
When you’re eating, there is a right and wrong way to chew. Here’s how to get the most out of your meals:

Don’t overload your spoon or fork. Food should stay on without falling off.
With food in your mouth, close your lips and start chewing. Your tongue should move the food from side to side and your jaw should rotate slightly.
Chew slowly, counting to 32 with each bite of food. You may need more or less time depending on the type of food.
Once the bite has lost all texture, you can swallow.
If you have digestive problems, drinking water when you eat isn’t always good for you. Drinking water can slow the digestive process by diluting enzymes in the body that break down food. This effect is especially intense if you suffer from digestive disorders such as gastroesophageal reflux disease.

Not chewing food enough
When you don’t chew your food enough, the rest of your digestive system becomes confused. Your body may not produce enough of the enzymes needed to fully break down your food. This could lead to digestive problems, including:

bloating
diarrhea
heartburn
acid reflux
cramps
nausea
headaches
skin problems
irritability
malnutrition
indigestion
gas

Other helpful eating tips
Get the most out of your food by eating right. Here are some tips for how to eat to improve your digestive health:

Drink 30 minutes before or after you eat, but not with your meal. This increases the efficiency of your digestion.
Don’t drink coffee right after a meal. That can speed up your digestion and send you to the bathroom. It can also cause heartburn from its acidity.
Avoid fruits and processed sweets right after a meal. Sugary foods are digested quickly and may cause gas and bloating.
Avoid exercising strenuously after a meal. Digestion requires energy, and it’s less efficient when you’re exercising.
Eat more fermented foods like sauerkraut and pickles. They contain digestive enzymes and beneficial bacteria needed to help your body absorb essential nutrients. Eating these foods can reduce symptoms of irritable bowel syndrome, gluten intolerance and allergies, and asthma.
Eat raw or slightly steamed vegetables, which contain higher amounts of enzymes and fiber. These are important for good digestion.
Go for a walk after a meal. This speeds the rate at which food moves through your stomach, aiding digestion.
Use probiotics. Poor sleeping and eating habits and travel can throw your digestion out of whack. Taking probiotics, made up of healthy bacteria, can help set your digestive system right again. Talk to a doctor to see which probiotics are best for your body.
Takeaway
Proper digestion starts in your mouth. When eating, be sure to chew your food thoroughly to get the full benefit out of it.

By focusing on chewing many times, you will eat slower. This can improve your digestion, help you eat less, and enhance your overall eating experience.